Getting Started with Spreadsheet.js
Prerequisite: A Tiny Web Server
The browser only accepts JavaScript modules if they are served over the http:// or https:// protocols. The file:// protocol is not accepted because of security reasons.
So we need a webserver. I recommend a tiny one, like Deno, the successor to Node.js. It is lightweight, secure, and supports Typescript out-of-the-box.
I have written an article about Deno, but here is a shortform intallation instruction:
Download and extract the precompiled package from https://github.com/denoland/deno/releases to a suitable folder on your machine and add that folder to your path environment. For Windows, it is "deno-x86_64-pc-windows-msvc.zip" package.
Then open a console window, navigate to the HTML folder and execute the following command:
deno install --allow-net --allow-read https://deno.land/std@0.167.0/http/file_server.ts
This will download, compile and start a tiny file server, with the current folder as www root.
Hereafter, you will only have to invoke the script:
deno file_server.ts
Note that the server listens on port 4507 by default, so the address in the browser must be something like "localhost:4507/my-page.htm".
A Calculator Spreadsheet
This first example builds a simple calculator spreadsheet with a predefined structure, some input cells and some calculated cells.
To follow along, you can download demo-empty.htm and spreadsheet.css, an empty spreadsheet template and the spreadsheet stylesheet. Open the HTML file in a text editor. Windows Notepad for example.
Step 1: Create the HTML Table
Create a <table></table> element. The table must have "spreadsheet" in the class attribute in order to be recognized by spreadsheet-core. Other class names can be added to override default appearance in CSS.
Then add more elements as shown below: The tbody element contains rows (tr), a row contains table header (th) and table data (td) elements. These are also called "table cells":
<table class="spreadsheet">
<tbody><tr>
	<th colspan="2">Circle</th>
</tr><tr>
	<td>Radius?</td>
	<td>1</td>
</tr><tr>
	<td>Diameter</td>
	<td></td>
</tr><tr>
	<td>Area</td>
	<td></td>
</tr></tbody>
</table>
And here is the result:
| Circle | |
|---|---|
| Radius? | 1 |
| Diameter | |
| Area | |
An ordinary HTML table. Nothing to get excited about.
Step 2 - Integrate spreadsheet.css
Now download spreadsheet.css and store it in the HTML folder. The CSS file defines the default appearance of a spreadsheet table. Many aspects and be modified or overwritten in you own stylesheets. To integrate it, add the following element to the document head:
<head> ... <linkrel="stylesheet" href="spreadsheet.css" /> </head>
If you then reload the document, the table disappears. Strange at first sight, but there is a reason for that:
Every spreadsheet table must have row and column label cells at top, bottom, left and right sides.
We have only two cells in each row, they are both considered to be row labels. And by default, label cells are invisible. So let's add the labels:
<table class="spreadsheet"labels="all"><tr><tr><!-- Upper column labels row --> <td></td> <td>0</td> <td>1</td> <td></td> </tr><td>0</td><!-- Left row label cell --> <th colspan="2">Circle</th><td>0</td><!-- Right row label cell --> </tr><tr><td>1</td><!-- Left row label cell --> <td>Radius?</td> <td>1</td><td>1</td><!-- Right row label cell --> </tr><tr><td>2</td><!-- Left row label cell --> <td>Diameter</td> <td></td><td>2</td><!-- Right row label cell --> </tr><tr><td>3</td><!-- Left row label cell --> <td>Area</td> <td></td><td>3</td><!-- Right row label cell --> </tr><tr><!-- Lower column labels row --> <td></td><td>0</td> <td>1</td><td></td></tr> </table>
Don't forget to add the labels attribute as shown above, which controls the visibility of labels.
Label cells carry the logical row and column addresses, starting from zero. They are highlighted in the code above. Tedious work with much potential for mistakes. Fortunately, spreadsheet-core.js provides code to generate label cells, as we will see soon.
Now we should have a spreadsheet table again:
| 0 | 1 | ||
| 0 | Circle | 0 | |
|---|---|---|---|
| 1 | Radius? | 1 | 1 |
| 2 | Diameter | 2 | |
| 3 | Area | 3 | |
| 0 | 1 | ||
Label cells at the right and the bottom are quite uncommon, but might be useful for writing expressions with cell references. More details on how to control visibility in step 4.
Step 3 - Integrate spreadsheet-core.js
Now download spreadsheet-core.js and spreadsheet-utility.js and save them in the HTML directory. The code in the spreadsheet-core module will do the heavy lifting for us. To use it, add the following code to the end of the HTML file:
<script type="module">
import * as spreadsheet from "./spreadsheet-core.js";
spreadsheet.initPage();
</script>
If you now reload the document, you won't see a difference. But if you open the browser developer tools and inspect the document, you will notice that row (tr) and cell (td, th) elements have been decorated with data-row and data-col attributes – the logical row and column addresses.
These attributes are used in the cell refference functions, available to spreadsheet expressions.
Step 4 - Row and Column Labels
Every spreadsheet must have row and column labels at all four sides (but they may be hidden). This make the code simpler that deals with spreadsheet size. Row and column labels are hidden by default. To make them visible, add the labels attribute to the table element, and supply one of the following values: top, right, bottom, left, both, all.
<table class="spreadsheet"labels="both">
This gets us the familiar spreadsheet appearance:
| 0 | 1 | ||
| 0 | Circle | 0 | |
|---|---|---|---|
| 1 | Radius? | 1 | 1 |
| 2 | Diameter | 2 | |
| 3 | Area | 3 | |
| 0 | 1 | ||
Not strictly necessary for calculator applications, but row and column labels might be a good idea while you write expressions with cell references.
As already mentioned, manually adding and maintaining row and column labels is a tedious task and bears many opportunities for mistakes. But spreadsheet core can generate them automatically. Just precede the labels attribute value with the string "generate,":
<table class="spreadsheet" labels="generate,both">
<tr>
	<th colspan="2">Circle</th>
</tr><tr>
	<td>Radius?</td>
	<td>1</td>
</tr><tr>
	<td>Diameter</td>
	<td></td>
</tr><tr>
	<td>Area</td>
	<td></td>
</tr>
</table>
Less effort, same result:
| Circle | |
|---|---|
| Radius? | 1 |
| Diameter | |
| Area | |
Step 5 - Adding Expressions
To get automatically calculated cell values, we need to decorate cells with expressions (aka formulas). They are placed as strings in the data-xpr attributes and are regular JavaScript.
Our simple calculator will calculate diameter and radius of a circle, so we will implement the appropriate expressions:
<td>Diameter</td> <tddata-xpr="2 * Math.PI * cell(1,1)"></td> <td>Area</td> <tddata-xpr="Math.PI * cell(1,1)**2"></td>
If you reload the HTML file, the calculated cells should now carry values:
| Circle | |
|---|---|
| Radius? | 1 |
| Diameter | |
| Area | |
Besides JavaScript functions, spreadsheet-core.js has many built-in functions that you can use in expressions. See the reference section for details.
Step 6 - Data Input
At this point, our calculator spreadsheet is pretty much static. But we will change that by decorating the radius value cell with a contenteditable attribute:
<tr> <td>Radius?</td> <tdcontenteditable>2</td> </tr>
This makes it a data input cell.
Now set the keyboard focus on the radius input cell and change the value. Then type tab or click outside the cell. When the cell looses focus, the expressions will be recomputed.
| Circle | |
|---|---|
| Radius? | 2 |
| Diameter | |
| Area | |
That's the core of spreadsheet core.
Step 6 - Formatting Cell Values
An excessive amount of fractional digits makes results hard to read. To change that, we will add a data-format attribute to the calculated cells:
<tr> <td>Diameter</td> <td data-xpr="2 * Math.PI * cell(1,1)"data-format="value.toFixed(2)"></td> </tr><tr> <td>Area</td> <td data-xpr="Math.PI * cell(1,1) ** 2"data-format="value.toFixed(2)"></td> </tr>
You might have guessed it, the data-format attribute carries ordinary JavaScript code. In this case, the variable value is used, which is provided by spreadsheet-core.js and carries the typed cell value, a Number object in this case. And a number object has a toFixed() method that provides the desired number of fractional digits:
| Circle | |
|---|---|
| Radius? | 2 |
| Diameter | |
| Area | |
Now click on the radius value cell, enter a different value, and then click outside. Diameter and area values should be updated accordingly. We have a nice, working calculator spreadsheet!
Data Input and Generic Spreadsheets
A calculator spreadsheet has mostly read-only cells, only the data input cells have the attribute contenteditable. Demo 2 has all cells editable. This is what a user expects from a usual generic spreadsheet:
Click on the cell(0,0). The string "s$" appears, a type specifier (s) and the prefix flag ($). This indicates that the cell type is a string. Press the right-arrow key and type "Circle". You have now entered a string value into the cell, indicated by the type indicator prefix. Press the tab key. The cell looses keyboard focus, which causes the text input to be parsed and stored as a typed value in the cell. Finally, the typed value is converted with the toString() method and shown in the cell.
Same for the next cell. Note that the cell content is selected. This time, just type "Radius?" without pressing the right-arrow key first. This overwrites the type indicator prefix. Press tab. Again, the input is parsed, stored and and formatted. If parser does not find a type indictor prefix, the value type is guessed from the input string. First, a number is tried, which does not succeed here. Then a boolean input is tried, which also fails. Last resort is a string type, which is correct in this case.
In the cell(1,1) enter "n$1". "n$" is the type indicator prefix for numbers, and "1" is the value. Press tab. This time, the text is parsed, converted into a JavaScript Number object and stored internally. A formatted version "1" is then shown in the cell.
Then enter "Circumference" into cell (2,0) and press tab.
In cell(2,1) we will enter an expression. Type "=$2*Math.PI*cell(1,1)", then press tab. The type indicator prefix "=$" means that the text input is a formula. In contrast to values, an expression is stored in the data-xpr attribute of the cell and then evaluated. The evaluation result is then stored in the typed value of the cell. The expression references the radius value in cell(1,1) and produces a numeric result, which is stored in the cell. Then a formatted value is shown in the cell.
This quite exactly how a usual spreadsheet works. But here it is pure HTML with a few lines of JavaScript!
Experiment further, add another formula for the area for instance.
Storing Spreadsheet Import Files to Disk
The content of a spreadsheet table can be saved to disk for documentation purposes, or to save a state of work. The spreadsheet-persistence.js module provides the functionality. Using it is astonishingly simple.
Let's go through an example.
| Theorem of Pythagoras | |
| Cathetus a: | 3 |
| Cathetus b: | 4 |
| Hypothenusis: | |
This is an ordinary and functional calculator spreadsheet. Note the download button above. If you click on it, a regular download will be started. Depending on your browser settings, the file is silently stored in your downloads folder, or the browser's save-to dialog is opened.
When the download procedure has finished, you can open the file in a text editor.
To accomplish this, add the following code to your web page:
<script type="module">
import * as spreadsheetPersistence from "spreadsheet-persistence.js" ;
spreadsheetPersistence.setupSaveLink( "sheet-9-save", "sheet-9", "sheet-9.txt", "text/plain" );
</script>
The function setupSaveLink from the spreadsheet-persistence.js module does the trick. The function expects a reference to or the ID of an a (link) element and a reference to or the ID of the spreadsheet table. The other parameters suggest the file name and the mime type.
Now click on the download button. After a short while (be patient!) the browser download dialog opens (if configured so). After another short while, the file is there and can be opened in Notepad.exe or an equivalent plain text editor:
<table id="sheet-9" class="spreadsheet" labels="both">
<tbody><tr><td></td><td>0</td><td>1</td><td></td></tr><tr data-row="0">
	<td>0</td><td colspan="2" data-col="0">Theorem of Pythagoras</td>
<td>0</td></tr><tr data-row="1">
	<td>1</td><td data-col="0">Cathetus a:</td>
	<td contenteditable="" data-col="1">3</td>
<td>1</td></tr><tr data-row="2">
	<td>2</td><td data-col="0">Cathetus b:</td>
	<td contenteditable="" data-col="1">4</td>
<td>2</td></tr><tr data-row="3">
	<td>3</td><td data-col="0">Hypothenusis:</td>
	<td data-xpr="Math.sqrt(cell(1,1)**2+cell(2,1)**2)" data-format="value.toFixed(2)" data-col="1">5.00</td>
<td>3</td></tr>
<tr><td></td><td>0</td><td>1</td><td></td></tr></tbody></table>
You will certainly recognize the structure. It is very similar to the circle calculator spreadsheet from above.
Loading a Spreadsheet Import File
Users can load stored spreadsheet import files from disk or a trusted URL.
Attention: Loading spreadsheets from untrusted 3rd parties can be dangerous. Read the import security guide!
Let's go through an example.
Step 1: Click on the "Choose File" button. This opens a browser open file dialog. Navigate to the downloaded "sheet-9.txt" file from above, select it and click "ok". The selected filename should show up to the right of the button.
Step 2: Click the "Import" button. A dialog appears:
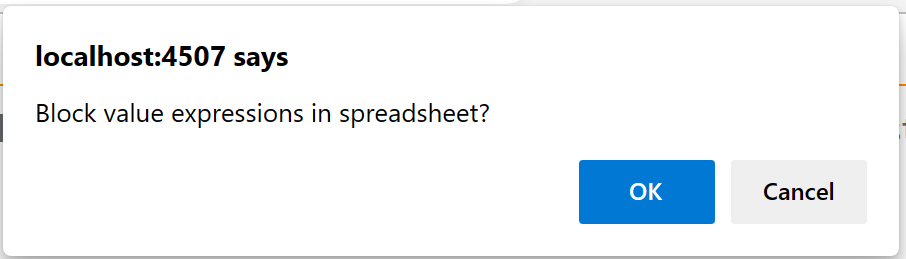
The import code has detected active content, value expressions in this case. Click OK. This will delete the value expressions. A similar dialog appears if format or parse expressions or script elements were found in the import file. Choosing the default action (OK) will remove them before integration into the document.
Script elements in the import file are always removed without consent. They are not required for spreadsheet functionality.
The imported spreadsheet should show up above the import buttons. While the spreadsheet does show the correct values, editing the input cells does not change the hypothenusis value – of course, the value expression has been removed.
Accepting Expressions
We know that the spreadsheet export file sheet-9.txt is safe, because we trust the source document and its origin, and no other person had access to the file. Therefore it is safe to import the file and accept expessions. So let's try it:
- Click the import button again
- Click "Cancel" prevent removal or value, format and parse expressions.
- Edit the input fields.
- Verify that the calculated cell is updated according to the changes.
To be continued!